In this new series, Chartered Surveyor Ian Rock FRICS – Author of the Haynes Home insulation Manual – explains how to cut your energy bills by boosting your home’s thermal efficiency.
PART SIX:
IWI – Internal Wall Insulation
Is lining the inside of your house a practical solution to heat loss?
Many older properties with solid walls are better suited to having insulation applied on the inside rather than being clad externally. Concealing the outer faces of period houses behind thick layers of insulation is rarely advisable because it has the effect of instantly annihilating their historic character. Cladding the outside is also significantly more expensive. So an alternative solution that can be installed more easily from inside whilst achieving good thermal performance is generally a better option.
Installing IWI has the further advantage of being within the capabilities of competent DIYers. Although working indoors will inevitably entail a certain amount of disruption, it can be done on a room by room basis to suit the occupants. Lining the walls on the inside can also be appropriate for some cavity wall buildings, such as those with very narrow cavities, timber frame buildings and individual flats.

PROS
* Costs less than EWI and is easier to install (no need for scaffolding).
* Can be combined with planned refurbishment projects such as refitting kitchens and bathrooms.
* Suitable for individual flats (externally insulating just one flat isn’t feasible).
* Suitable for multi-storey buildings where external access is very expensive.
* Suits individual terraced and semi-detached houses were EWI on just one building would look unbalanced.
* Suitable for period properties with attractive facades or those in Conservation Areas.
CONS
* Disruption to occupants.
* Making walls thicker means losing a small amount of floor space.
* Major disturbance to fixtures and fittings, and is potentially damaging to period features.
* Not suitable where walls are damp, unless first remedied and allowed to dry out.
* Accommodating electrics, radiators and extensive pipework can be complex.
Materials
As we saw in earlier blogs, there’s a large variety of insulation materials on the market. For lining walls internally popular materials include:-
* Rigid boards, eg polyurethane (PUR), polyisocyanurate (PIR) or phenolic foam (PF)
* Insulated plasterboard (eg PUR, PIR, or PF)
* Batts of mineral wool or sheepswool for studwork
* Interlocking boards of woodfibre
Depending on the material used, you are likely to require an insulation thickness of between 80mm and 120 mm to meet the U- value target of 0.30 Wm2K.
Design considerations
Before you start, there are a number of key issues to consider:-
* Is the wall damp?
Any damp issues must be resolved before insulating, otherwise lining the walls could make matters worse.
* Loss of room space
Lining your walls will typically mean losing about 125mm or so of floor space in a typical room, but only on one or two walls (the main external ones). In most cases this will be imperceptible but can be a factor where the bathroom, cloakroom or kitchen is very small.
* Bumps and gaps
Any gaps or cracks in the walls can cause draughts and heat loss, undermining the performance of the insulation, so must be filled before insulating
* Air-tightness
An air-tight vapour control membrane is key to the performance of the insulation (the exception is where you’re dealing with historic buildings where the walls need to ‘breathe’ – see below).
* Services
A chink in your home’s armour can occur anywhere that pipes and cables penetrate insulated walls (eg switches and sockets). Where you’ve got a large number of pipes or cables to accommodate an independent studwork inner wall can be built leaving a space within which they can be run.
* Sound transmission
Applying layers of thermal insulation should also help reduce noise transmission. However the acoustic performance of some materials is better than others. Where sound insulation is important, a mineral wool quilt or batts can achieve good results.
* Supporting fittings
To line the wall various fittings will have to be temporarily taken down, such as kitchen units, radiators, boilers and basins. So it makes sense to fit the insulation when these are due to be replaced anyway, for example when you’re planning to refit the kitchen. To re-mount heavy fittings on newly insulated studwork walls, thick timber battens can be inserted between studs. Or you could line the insulation with a layer of plywood under the plasterboard to provide support.
Installation
Whatever type of insulation takes your fancy, there are a number of different methods for installing it:-
1/ Fixed directly to the wall (gluing, screwing or dabbing)
Where the wall is dry and the surface is reasonably even and not too bumpy, rigid insulation boards can be glued directly to the wall with special adhesives (eg ‘pink grip’). Where wall surfaces are uneven, dabs of plaster can be used to bond insulation boards in place. These methods are sometimes combined with mechanical fixings inserted into wall plugs embedded in masonry walls. Special insulated screw fixings must be used because conventional metal screws will conduct cold, with a risk of ‘cold bridging’.
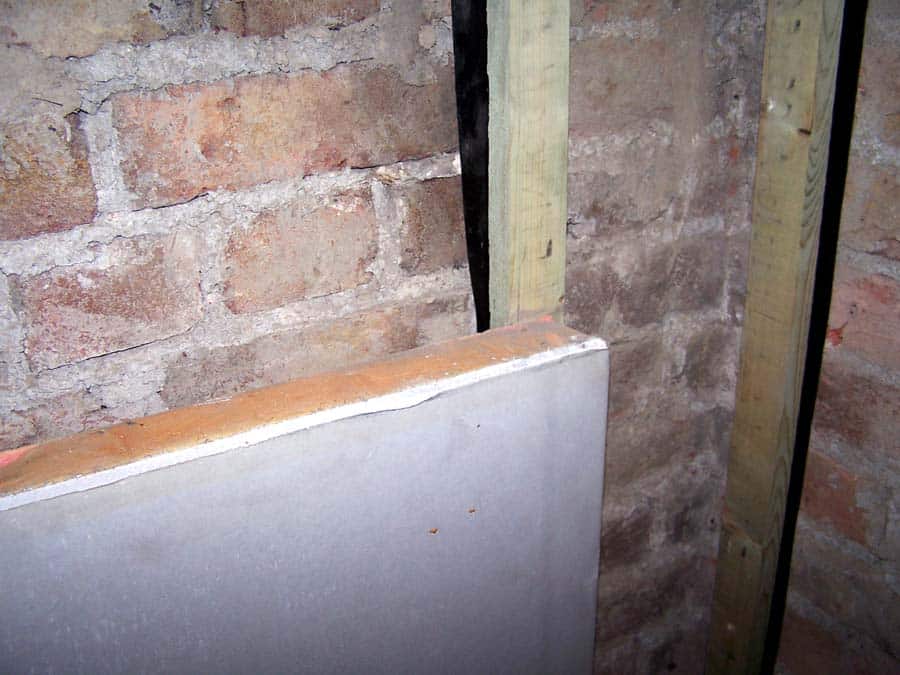
2/ Fitting to battens
Where walls are lumpy and uneven, a timber framework of preservative-treated battens can be plugged and screwed to the wall. Insulation can then be installed by being squashed into individual panels between the framework. This suits a wide range of materials such as wool quilts, woodfibre boards or cellulose batts. Alternatively, the insulation can be applied over the timber battens by screwing rigid boards to the timber framework. However this increases the overall thickness, encroaching about 160mm into the floor space. For optimum performance both methods can be combined.
3/ Independent ‘floating wall’
A separate ‘floating wall’ can be built as an independent inner lining with a gap left between the new insulated inner leaf and the original wall. This is sometimes used in period properties where there’s potential for moisture in the walls (eg from rain penetration in severe weather). The air space should be ventilated to the outside to allow any moisture to escape.
* Tricky bits – critical detailing
Vapour barriers
Probably the greatest concern with internal wall insulation is the control of moisture. To prevent the problems with hidden ‘interstitial condensation’ causing dampness inside the cold wall structure, any cracks and gaps must be fully sealed to banish moist air from entering. As a precaution against moisture penetration, a continuous vapour barrier (usually in the form of special plastic sheeting) is normally applied on the room side of the insulation prior to plasterboarding.
Thermal bridging
Some parts of a property can act as ‘cold bridges’ conducting cold from outdoors into the room, and conversely channelling warmth from indoors out of the building. This can also be a problem at certain ‘critical details’ where a full depth and coverage of insulation can be difficult to achieve, such as around window and door openings. So it’s important that the reveals are fully lined, returning the insulation round the corner of the wall right up to the frame.
Thermal bridges can also occur where internal walls and floors meet the main external walls because they interrupt the continuity of the insulation (one reason why EWI is regarded as technically superior). One way to resolve this problem is to lap the insulation so it continues round the corner along the internal walls rather than stopping dead. The insulation should be ‘returned’ at least 300mm along the internal wall and ceiling surface. In floors, mineral wool can be stuffed between the joists for the first 500mm or so to reduce thermal bridging.
Historic buildings
For older buildings, the alternative to using vapour control membranes is a modern ‘breather membrane. These are compatible with natural breathable insulation materials such as hemp, sheepswool or wood-fibre boards that allow any moisture to evaporate harmlessly away.
In period properties aesthetic considerations are also of great importance.
Works that damage their appearance and character can slash values, and may be illegal (eg in listed buildings). Traditional features such as plaster cornices and picture rails, skirting boards and door architraves may all be affected by internal wall insulation. One option is to leave them undisturbed and concealed behind the insulation. Alternatively it may be possible to very carefully remove them before being re-instated later on the new wall surface.
In historic timber frame buildings the oak frame is a key feature, often being visible externally and internally. So instead of lining the inside face and sacrificing the aesthetic appeal of exposed posts and beams, it may be possible to discreetly add layers of natural insulation to the panels between the framework. Buildings that are tile clad or weatherboarded externally can sometimes have insulation placed discreetly within the frame behind the cladding.
If in doubt it’s always a good idea to consult an expert in historic buildings.
NEXT MONTH: Cheap and easy? When it comes to insulating lofts there are many ways you can get it wrong. We look at how to avoid doing a botched job.
Ian Rock’s home insulation tips are taken from the new Haynes Home Insulation Manual. For further information see www.home-insulating.com